|
previous topic :: next topic |
| Author |
Message |
pdxmonkeyboy

Since 16 May 2006
6081 Posts
forever labled as the
retired kiter & motorhead Unicorn Master
|
 Wed Jun 18, 08 9:20 pm How to fix a blown bladder Wed Jun 18, 08 9:20 pm How to fix a blown bladder |
 |
|
Ok, so I have fixed about 5 bladders in my kiteboarding life and have gotten fairly skilled at it. I have an absolutely brutal hole in this cabrinha main strut bladder so I guess this is a good "worst case scenario".
By the way, pdxmonkeyboy and the united confederation of unicorns will take no responsibility for you blundering your repair. The worst you can do is waste some repair tape, the best you can do is save yourself upwards of $100 on a new bladder.
So I don't want to post my pictures externally so you will have to follow the text and then look at the pictures. The pictures are backwards so the last one is first. Sorry.
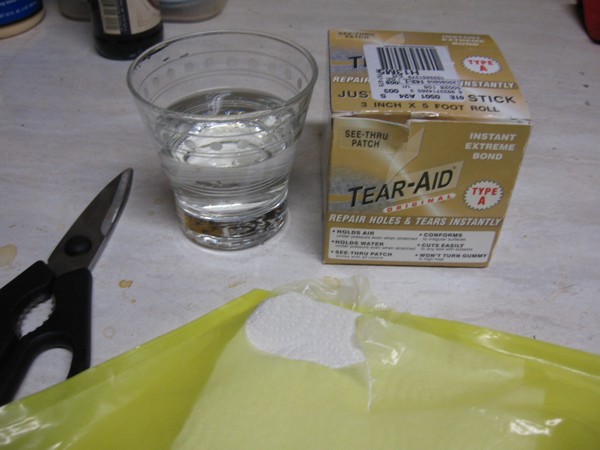
1. your going to need some tear-aid Type A. Get it online. Your also going to need some rubbing alcohol and some scissors.
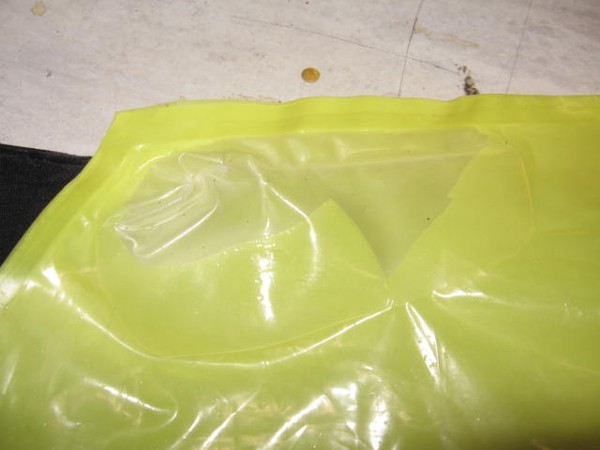
2. So you can see I have a nasty hole right on the seam. i also have a SUPER nasty rip in the tail end from snagging the bladder on the edge of my table saw 
3. The first hole was cause by not using talc powder when I instlaled the bladder, it got folded and when I pumped it up the bladder stretched and popped. so be forwarned that you need to really make sure the bladder isn't twisted or folded when you put it back in.
Ok, #1 cut all the stretched bladder material away and clean everything with half alcohol/ half water
#2. since this is right on the seam and there is a chunk of bladder material missing, I have to patch the INSIDE of the bladder and the outside.
#3 so to turn it inside out you have to cut a slit in the middle or rear of the bladder and turn it inside out. Put a piece of duct tape on the baldder and then cut a slit through it. this will ensure the cut doesn't migrate you are turning things inside out.
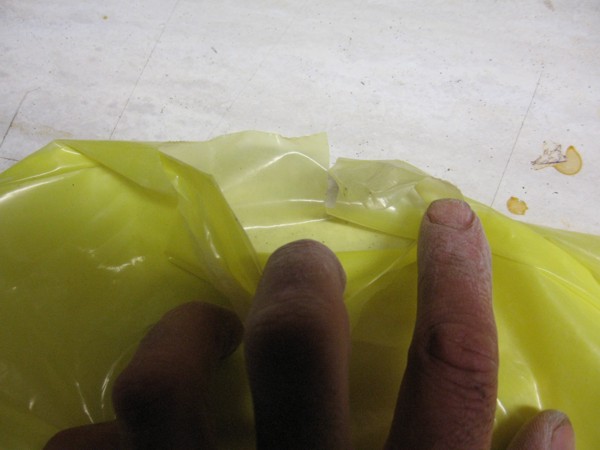
#4 carefully turn it inside out. (see pic inside out below).
#5 now the fun begins. two important points. One, that shit is sticky, you lay it down, it stays down. two, you do not want any wrinkles in the material under the patch. NONE.
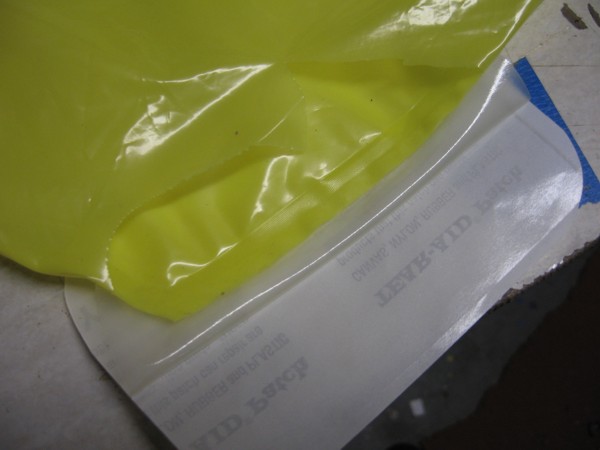
#6 so as this is an edge patch I am strarting on the side opposite the big hole. Cut a piece of repair tape much larger than the whole and round the corners off with the scissors.
#7 peel back just a little portion of the patch, fold it over and slowly place it on the edge (see photo edge method).
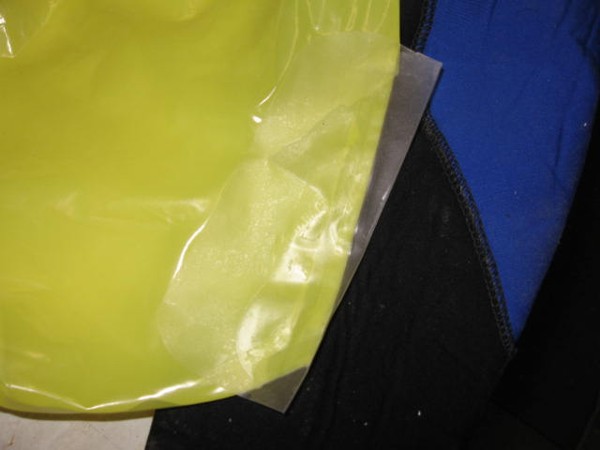
#8 one you have it stuck in place, flip everything over and cover the rest of the hole with the patch. don't worry about folding the patch exactly over the edge of the bladder- this is the inside (see photo) you can trim things up but don't trim all the way to the edge of the bladder.
#9 REALLY press hard to push the patch in place. Now turn the bladder right side in.
#10 hey look at that its kind of fixed. (see pic inside out repair from outside)
#11 now mash the patch if you need to so that you have don't have any wrinkles in the patch area. you weights or a friend to help. I have a unicron to help me but it is just out of the frame.
#12 repeat the inside patch process with the outside patch. I can not stress how important it is to not have any wrinkles. TADAH!!! (see done photo)
now you have to fix the cut that you made to turn it inside out.
For this I again cut a patch larger than the hole and take half the paper off. I slip this inside the bladder and using my fingers, spread the bladder onto the patch. once this has no wrinkles in it I take the other side of the paper off the patch and rub the other side of the cut onto the patch.
Then simply put a nice big patch over everything on the outside.
Rub everything a bunch more and then test for leaks with soapy water.
It may look a little frankenstein but that tape will stretch with the fabric and I ahve had good luck with it. At any rate, most holes are not as sever as this one but like I said, if you can do the worst case scenario your doing pretty well.
 |
| |
one.jpg |
 |
| |
inside out.jpg |
 |
| |
edge method.jpg |
 |
| |
edge don't matter.jpg |
 |
| |
inside out repair from outside.jpg |
 |
| |
done.jpg |
|
|
|
Pete

Since 29 Oct 2007
850 Posts
Opinionated
|
| Thu Jun 19, 08 7:22 am |
|
|
| Dude, nice fingers?
|
|
|
pdxmonkeyboy
Since 16 May 2006
6081 Posts
forever labled as the
retired kiter & motorhead Unicorn Master
|
| Thu Jun 19, 08 9:08 am |
|
|
| Pete wrote: | | Dude, nice fingers? |
That's talc from the inside of the bladder.
The patches were successful. No bubbles last night and the bladder had the same pressure this morning.
|
|
|
kyle.vh
Since 11 Jul 2007
713 Posts
city of angels
Addicted
|
| Thu Jun 19, 08 10:02 am |
|
|
nice! thanks for the walk-through. I forwarded this link to some friends.
I'm glad for the new avitar, too. With the old one I used to be like: oh, nice boobs... ahhh! ape tits!! Everytime.
|
|
|
Speedo

Since 07 May 2007
264 Posts
Obsessed
|
| Thu Jun 19, 08 10:11 am |
|
|
Thanks for the articles and the pix 
|
|
|
bulae99
Since 12 Jul 2006
1693 Posts
XTreme Poster
|
| Thu Jun 19, 08 10:18 am Great Post Dude! |
|
|
Nice Monkey.............Good monkey

_________________
Karma is a thing. |
|
|
Spike

Since 13 May 2007
1414 Posts
Alameda
Spelling Expert
|
| Thu Jun 19, 08 12:00 pm |
|
|
| so you cut a second hole in the bladder to patch the first? is that only because the first hole was on a seam? Otherwise it "seams" to defeat the purpose. How do you patch the second hole? Just patch stuff on only the outdide I imagine...
|
|
|
pdxmonkeyboy
Since 16 May 2006
6081 Posts
forever labled as the
retired kiter & motorhead Unicorn Master
|
| Thu Jun 19, 08 12:46 pm |
|
|
I cut a slit in the bladder so that I could turn it inside out to patch the inside of the huge hole. If there is a chunk missing, or you need to cut a chunk out because it is all stretched, your going to need to patch it on the inside and outside.
patching the slit you cut is easy. You can get way with just patching the outside but I always slide one inside just to be safe. You need to only expose half of the patch and slide it into position then carefully place the bladder on the patch, then expose the other side and do the same.
the key really is no wrinkles.
|
|
|
blowhard
Since 26 Dec 2005
2030 Posts
Windward
|
| Thu Jun 19, 08 3:23 pm |
|
|
good docs pdxmb
I would throw in that if you split along a seam,or somewhere you have paralell tears
glue works good .
and using water to shake the bladder into place is
helpful to avoid
voids
|
|
|
pdxmonkeyboy
Since 16 May 2006
6081 Posts
forever labled as the
retired kiter & motorhead Unicorn Master
|
| Thu Jun 19, 08 3:33 pm |
|
|
never heard the water trick. you fill the bladder with water then insert? I always talc the shit out of them and use a little air. Water sounds like a great idea.
Also, if you blew up your bladder on the water and then got tons of sand and shit in your bladder sleeves, you have to rinse your kite really well. Sand will eat your bladders for breakfast!!
|
|
|
blowhard
Since 26 Dec 2005
2030 Posts
Windward
|
| Thu Jun 19, 08 4:27 pm |
|
|
insert bladder in kite ,
then add small amount of water and shake corners into place
blow out water when air released.
If small struts, very hard to get into corners otherwise
talc is a mess
|
|
|
Spike
Since 13 May 2007
1414 Posts
Alameda
Spelling Expert
|
| Thu Jun 19, 08 5:20 pm |
|
|
| I'm not so sure what is so difficult about sticking a bladder back in. I've done a repair on a bladder and folded it up accordion-style, tied a rope to the end, puled the rope through the zipper in the LE, and out to the wintip. throw some talc powder over the bladder and it slides in without any problems. I pull the bladder all the way through out the wingtip, and fold the excess back over itself into the tip of the LE. I'd like to avoid putting water in the LE, keeps it from ever sticking together, especially if you go snowkiting, water in the LE is BAD!
|
|
|
blowhard
Since 26 Dec 2005
2030 Posts
Windward
|
| Fri Jun 20, 08 6:43 am |
|
|
water can be removed
no problems in snow (for me)
maybe you were lucky
some bladders are very difficult to seat
talc is dirt
|
|
|
|